My A2 'blog'...

I've got a replacement fan for you if you need one.

Ps its my car with the Avus wheels fitted in the photo above. They are a nice wheel and fill the arches well bit my car has come a long way since then and they have been replaced by 3 or 4 different wheel combos since.
 
I've got a replacement fan for you if you need one.

Ps its my car with the Avus wheels fitted in the photo above. They are a nice wheel and fill the arches well bit my car has come a long way since then and they have been replaced by 3 or 4 different wheel combos since.

I'll pm you in a tick about the fan...

What size tyres did you run on the Avus? I am in two minds over 205/40 or 215/40 17's...

<tuffty/>
 
I had 205/40/17 on mine but would recomend 215/40/17 as there is plenty of room for them and they look better.

The one thing I would say is that most oft he 17 inch Audi wheels are very heavy. I'm now using 3SDM 0.05 18 x8.5 alloys with 215/35/18 and the whole wheel is a LOT lighter and rolls better as a result.


Here's a photo of the void left by the heater fan I just removed for you. Took a photo so you can see the location of the hole tonremove the top screw.
 
?? Confused by this Gary, there only one connection and thats at the front which doesn't need replacement

oh my bad ts from further up tufftys thread where he temp repaired the brake shoe sensor wiring as first time id read that and having replaced one myself i still had the ebay listing
 
Ahhhh so there is a hole in the cross member to get to it then... sounds like fun lol

Thanks dude..

<tuffty/>

This is the hole I meant. I lost a lot of knuckle skin before noticing it and making my extension 'tool'


Sent from my iPad using Tapatalk
 
when you get round to the wiring you may need one of these kits to replace the plug, 1J0 973 802 , 1J0973702 you can just buy the conector plug itself which is much cheaper from china but theres delivery times in play and these come with all the water seal boots

http://www.ebay.co.uk/itm/VW-AUDI-V...040115&hash=item1e9b912288:g:F~cAAOSwBahU415R

I'll be having one of these too - my diy pin replacement within the original corroded housing lasted 3 years but this will be much better for the longer term. :)


Sent from my iPhone using Tapatalk


Here's a photo of the void left by the heater fan I just removed for you. Took a photo so you can see the location of the hole tonremove the top screw.

Looks like the dreaded photobucket revenue stream model of doom has hit you dude... your image is not available :/

<tuffty/>
 
Looks like the dreaded photobucket revenue stream model of doom has hit you dude... your image is not available :/

<tuffty/>

Yes it happened today. I've just tried to download the image to my phone and it won't let me do that even. They want $399 a year to be able to use them as a host.

Did you have any luck fitting it?
 
Yes it happened today. I've just tried to download the image to my phone and it won't let me do that even. They want $399 a year to be able to use them as a host.

Did you have any luck fitting it?

Daylight robbery isn't it!... my account has yet to succumb to this but I have no doubt it will... used my blog hosting for the last update... will have to move all my pics over to that at some point and have a word with admin to allow edit on posts so I can change the links else all the images in this thread will disappear too..

Ah well...

No mate, not made a start yet... just as I finished up work around 4pm it started to rain... weather looks to be better tomorrow so will crack on with it then

<tuffty/>
 
So this morning I finally got around to doing the fan... big shout to Steve for sorting this out...

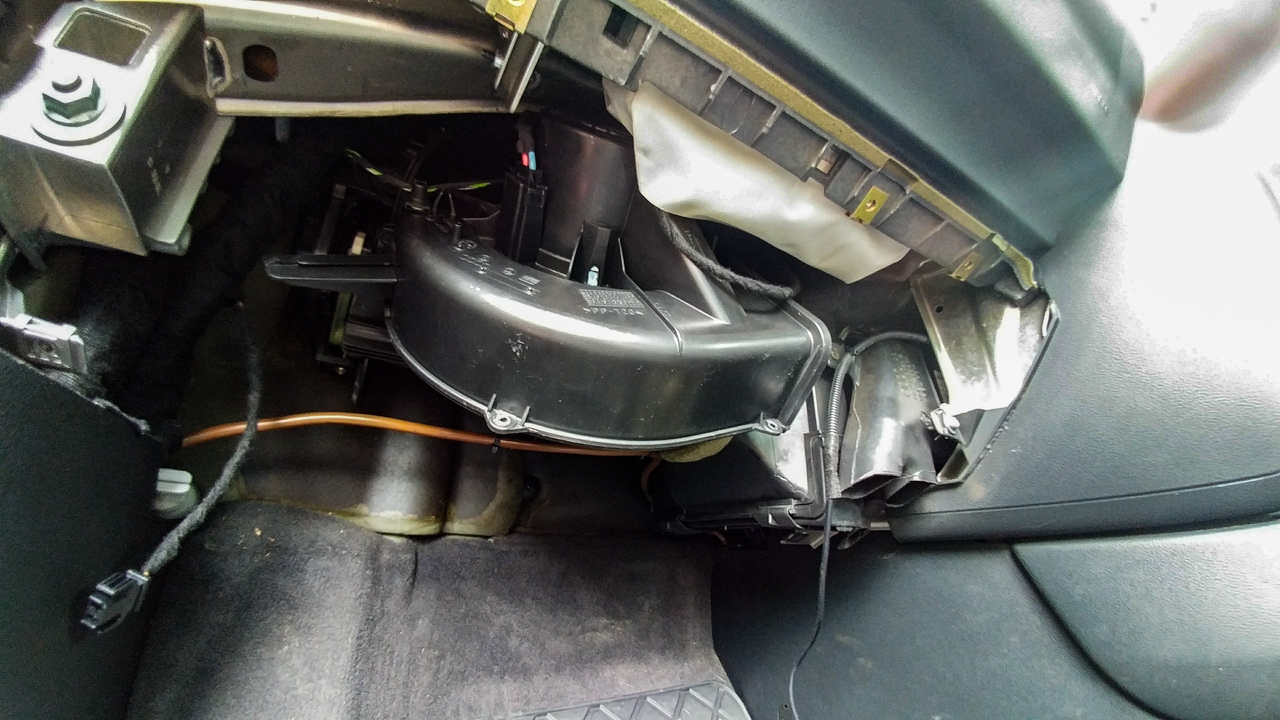
Was anticipating a fight but in all honesty it was far easier than I thought it would be... I didn't even need to remove the air bag..

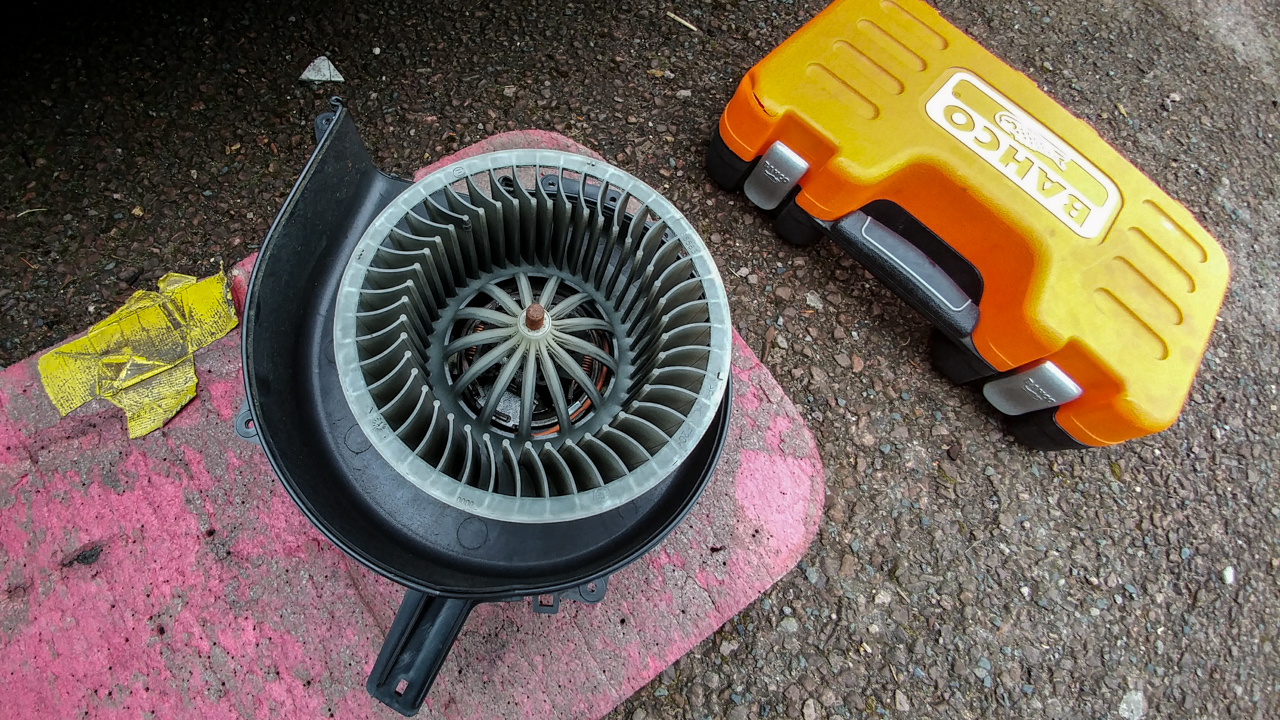
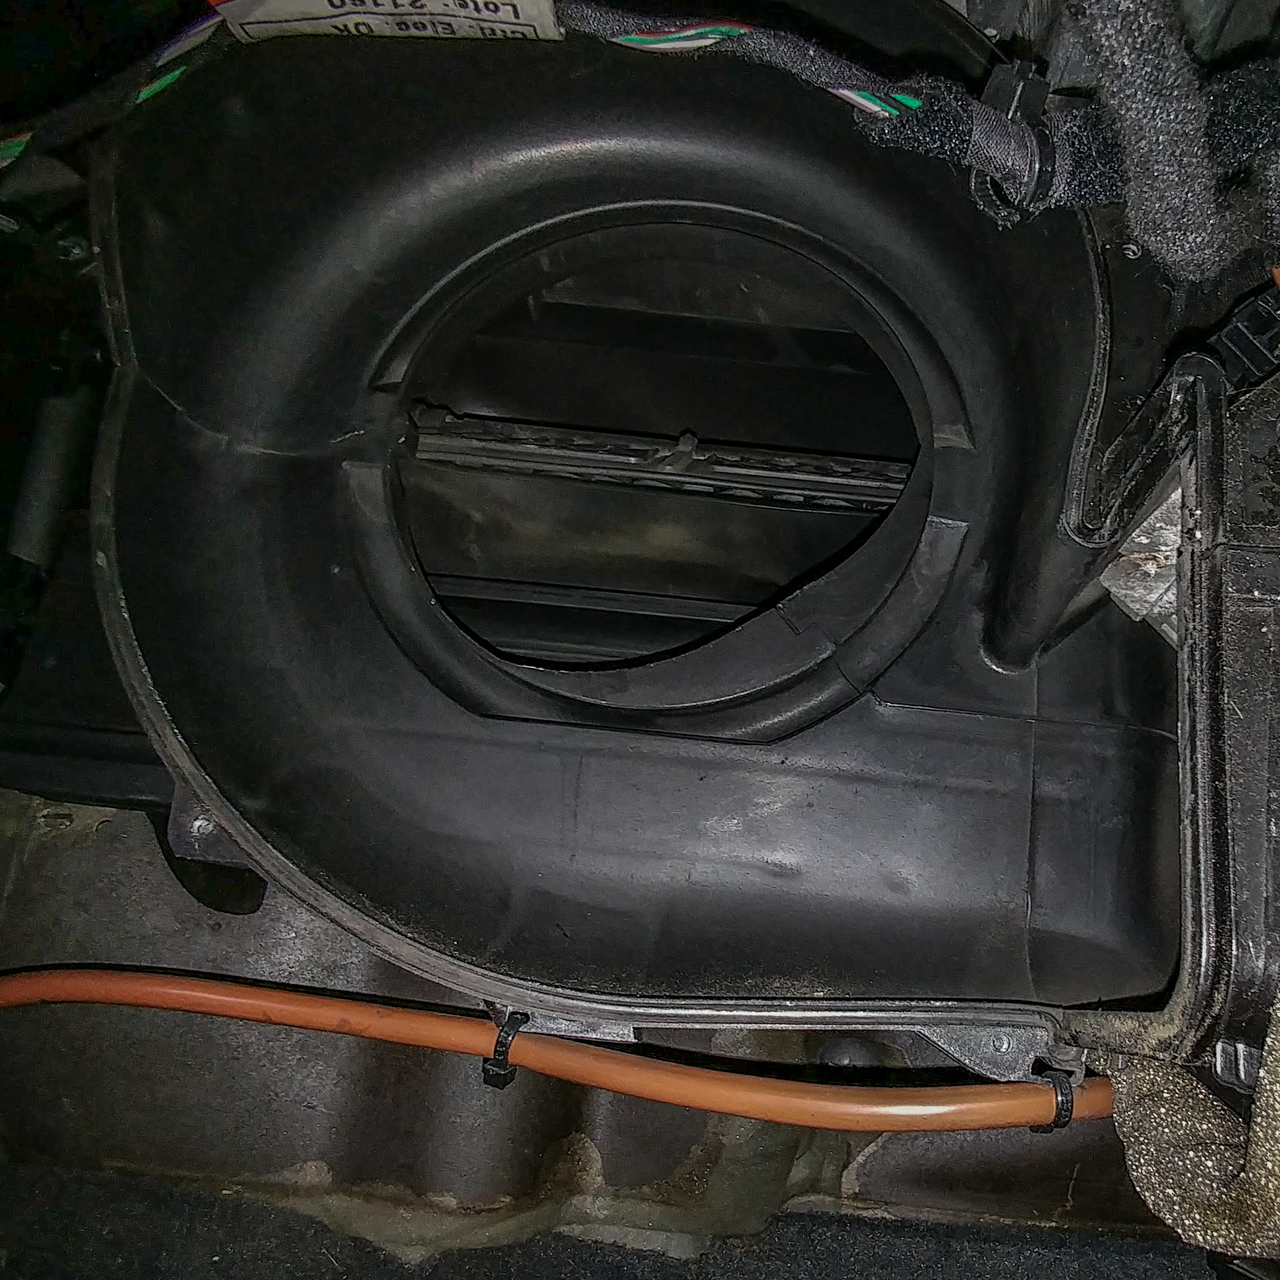
The replacement fan...
20170701-96dpi-20170701_093045.jpg


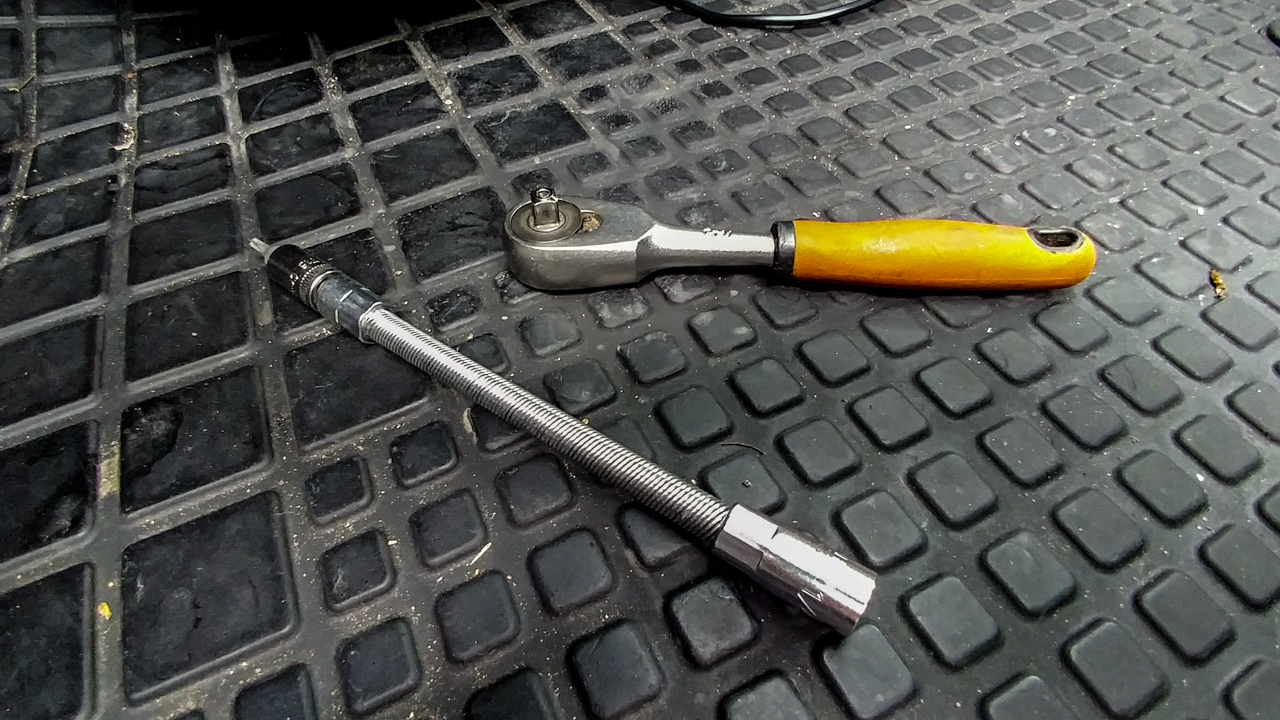
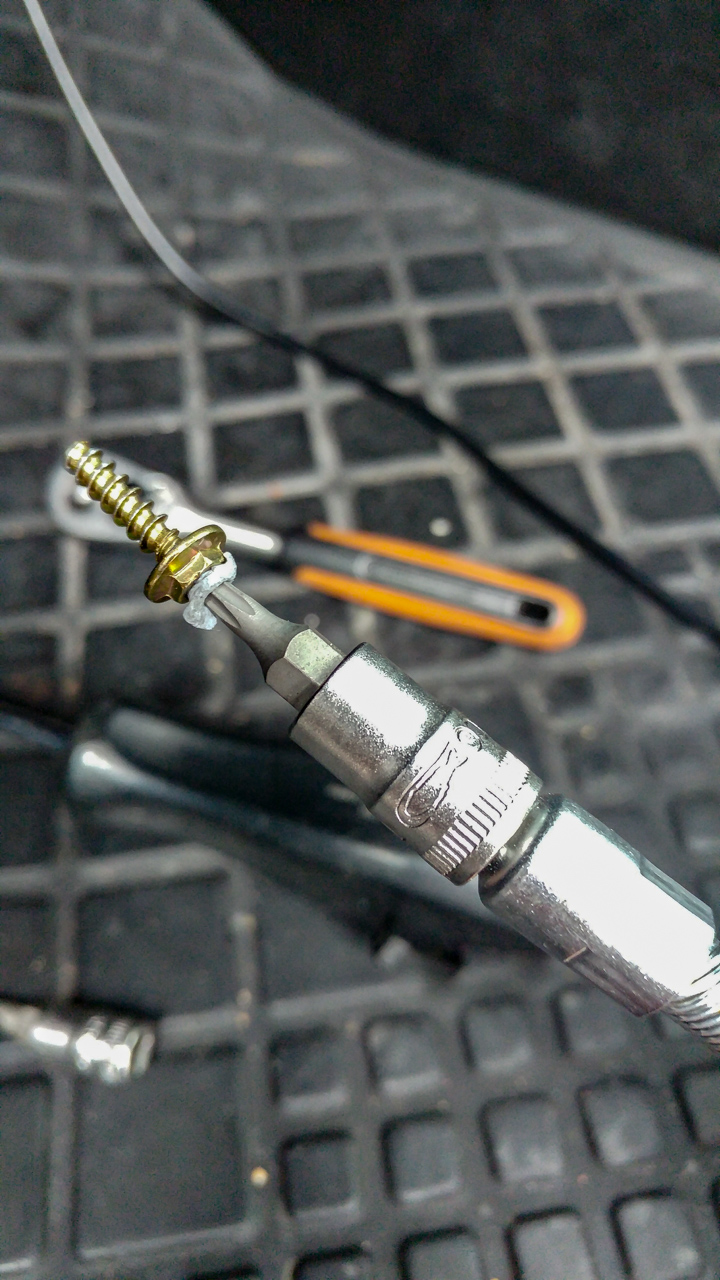
Weapon of choice for attacking the more awkward screws...
20170701-96dpi-20170701_093719.jpg


The flexible shaft makes it much easier to feed into the 'secret' hole...
20170701-96dpi-20170701_093533.jpg


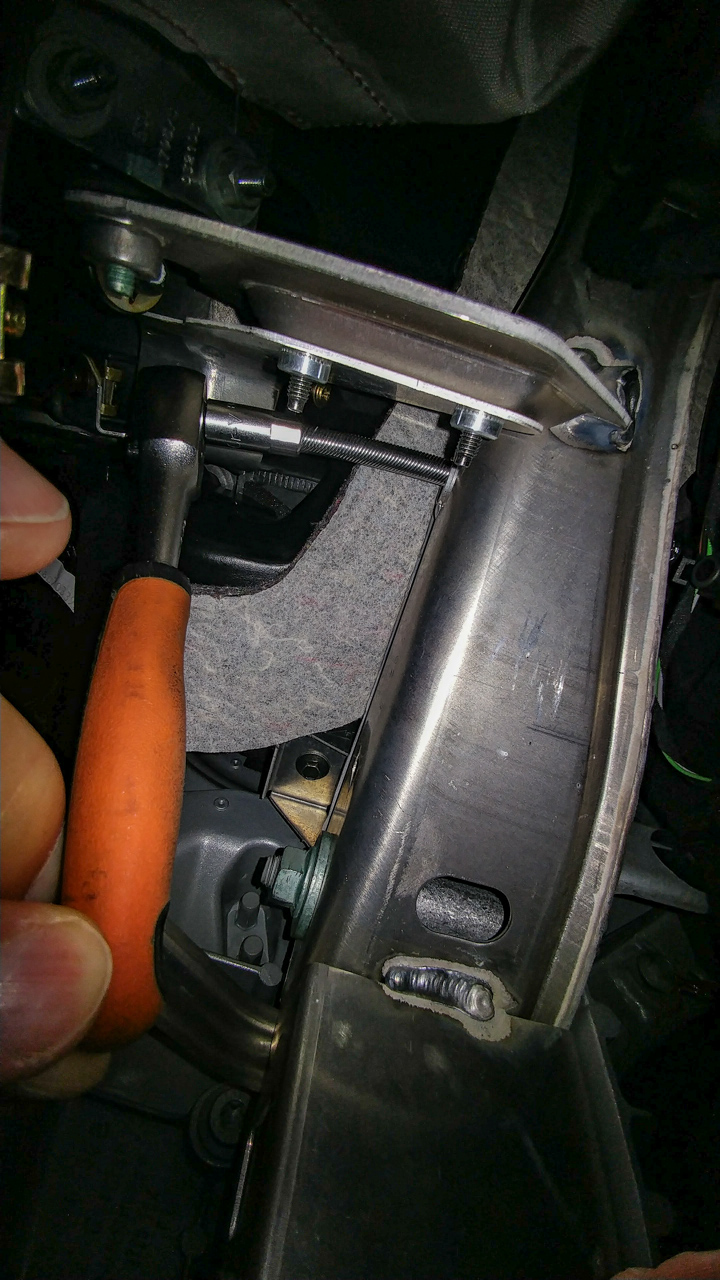
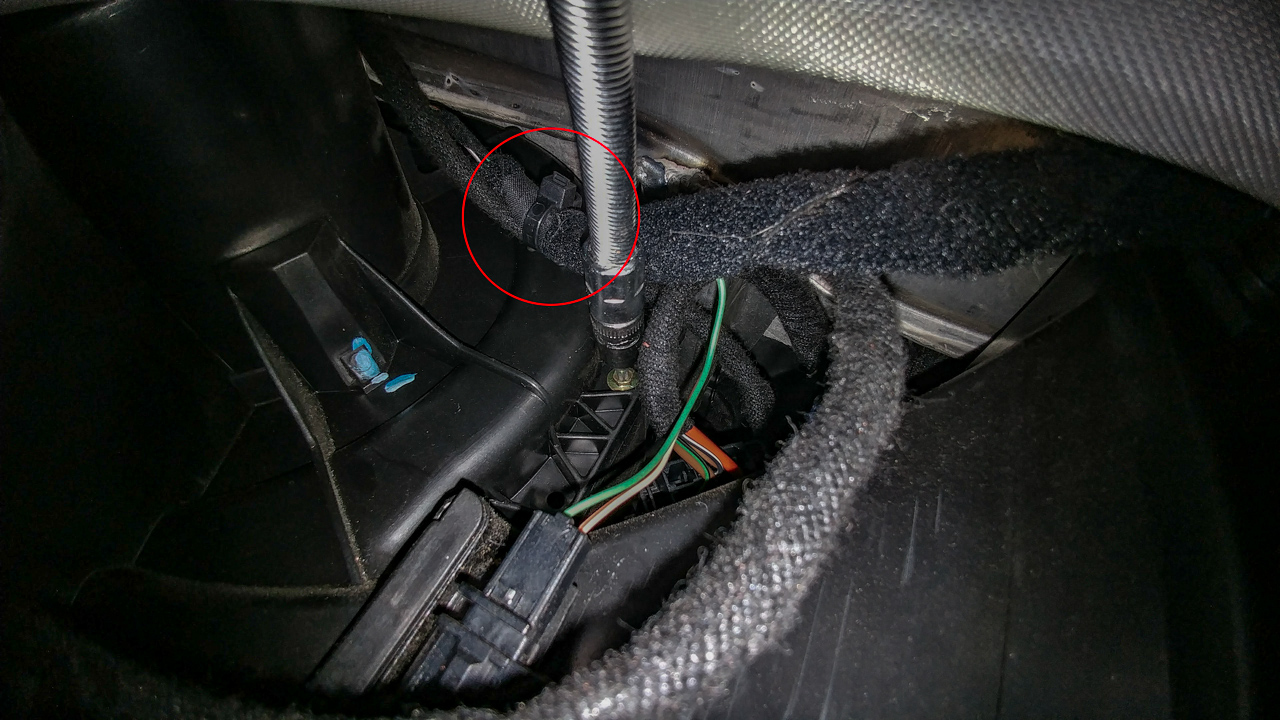
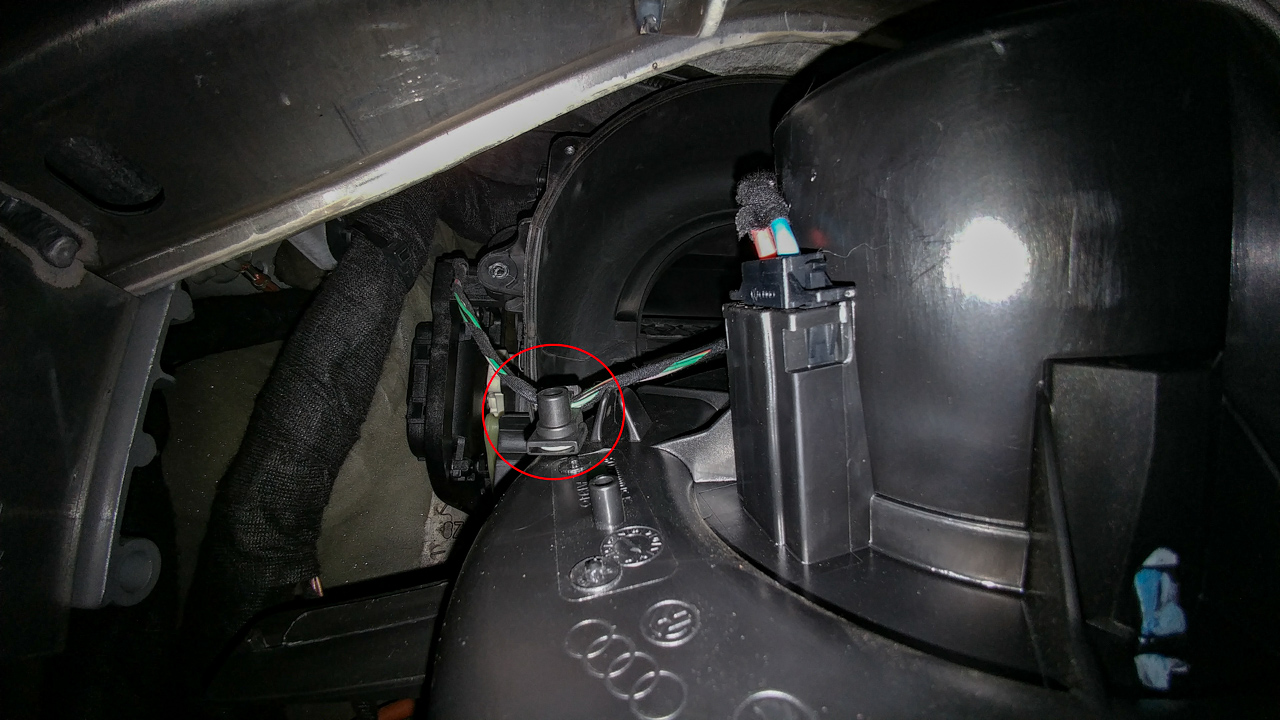
It also makes undoing the other screws easier... note you will need to address the cable tie holding the loom onto the fan housing (circled red)
20170701-96dpi-20170701_094007-Edit.jpg


There is another cable tie to deal with before the fan assembly can be removed..
20170701-96dpi-20170701_094149-Edit.jpg


Pull the fans power plug (which is a little awkward... needs pinching both sides to release the latch) and a little gentle wrestling it all comes out...
20170701-96dpi-20170701_094112.jpg


20170701-96dpi-20170701_095138.jpg


Fitting is the reverse of the above... I used a little blutack on the screws to help get them back in..
20170701-96dpi-20170701_100206.jpg


I did do a quick test after fitting the bottom two screws just as a precaution... no reflection on Steve I must add but have been in situations before with awkward to fit parts only to find after the hassle of fitting them they don't work... its just something I do :)

All was good... the fan fired up straight away and noticeably quieter than the old one so was a very happy chappy :)

I cable tied the looms back to the posts on the fan housing and for the time being cable tied the glove box light cable out the way until I get a chance to fixing the 'switch'

Glove box back in and all ready for going away next week...

Once again thanks to Steve for sorting out the fan and both Pinky and Steve for the heads up on the 'secret' access hole

<tuffty/>
 
Happy to help :)

I wouldn't wish my knuckle injuries after my first attempt at this job on anyone!

A great walk through with pics - I would have loved to have this. Elsawin didn't really make it clear for me like an actual picture can

Cheers Tufty.


Sent from my iPhone using Tapatalk
 
Hi Tuffty, sorry to drag up a old thread but I have also developed a leak on one of my coolant pipes, the same single pipe you have replaced on your Coolant Flange, the fat one, is there any chance you could give me the part number please, I have a (A2 1.4 tdi) 2003

Thanks Shaper
 
Back
Top