At the request of a fellow forum member I have collated the below regarding the replacement of a faulty G263 sensor. Hopefully this will be of some help.
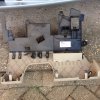
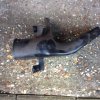
G263 sensor (stock photo)

Note: when fitted it will be the other way up (so the angle is downwards) with the connector end on the right hand side i.e. thin end slotted into the dash from the driver side to passenger side.
Accessing sensor
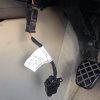
In the drivers side footwell undo lower cover directly above the pedals - two torx screws undone, one connector unclipped, bonnet release mechanism freed and the footwell cover comes off

Undo footwell air director - loosen one plastic torx screw and unclip footwell air director from housing

Unclip brake and clutch switches - locate brake switch, twist in metal bracket housing and release. Note the brake lights will now be lit, if you don’t want them lit for the duration of the job, then mask off the connector end to make the connection and extinguish the lights.
Reach up further, locate clutch switch, twist in metal bracket housing and release.

If you now lie with your head by the clutch pedal you should be able to see a clear path to the sensor. Note you will not be able to see the sensor at this stage, all you have done is clear a path for your hand.
If you want to see the sensor, move your head towards the centre console and look up past the V70 motor that is on the inner side of the aluminium bracket by the clutch pedal. It's pretty non-descript but what you will be looking at is the end of the sensor and connected connector, that is on the left hand side of the G263 picture above (connector not pictured).
Sensor removal
I found it easiest to sit on the passenger seat and lie back at an angle with my face on the upper dash on the passenger side of the instrument binnacle. You will be flying blind. Closing your eyes and sticking your tongue out to aid concentration are optional!
Using your right hand, follow the path you have created and feel around for the clutch switch bracket to use as a reference point.
When the clutch switch bracket digs sharply into the back of your hand just above your wrist you should find immediately below your thumb will be a hole and through this you will be able to feel the G263 sensor end. Likewise, through a separate hole, underneath your index finger you will be able to grasp the sensor. Your thumb palm should now be completely around the aluminium cell.
The important bit is to realise that the sensor is held in by suction and therefore if you remove the connector before attempting to remove the sensor it's impossible - well it was for me anyhow. Attempting to release the sensor with the connector still on, means you can grasp the tab wings and carefully ease it out.
Be aware that the connector wires have a relatively limited amount of travel so ensure you're pulling is as straight a line as possible and don't pull further than you absolutely have to, once the sensor is released.
Connector removal from sensor
To remove the connector from the sensor, re-position so you are facing up in the footwell with your head fighting with the clutch pedal. With a bit of pre-planning, there is a clear path for your left arm through behind the pedal box and up to the end of the sensor. You have to get elbow deep and keep pushing until your left hand reaches the sensor. With you right hand following the path it did to remove the sensor in the first place, this means you can get both hands on it and remove the connector easily.
Refitting
Refit is simply a repeat of removal but in reverse, being careful to feel for the locating hole before pushing the sensor home. Again, halfway through refitting you need to re-position from the passenger seat to the drivers footwell to reconnect the connector and then returning to passenger seat you will be able to push the sensor home.
All-in-all it took me 15 minutes and is an easy DIY task requiring a little gymnastic ability
G263 sensor (stock photo)

Note: when fitted it will be the other way up (so the angle is downwards) with the connector end on the right hand side i.e. thin end slotted into the dash from the driver side to passenger side.
Accessing sensor
In the drivers side footwell undo lower cover directly above the pedals - two torx screws undone, one connector unclipped, bonnet release mechanism freed and the footwell cover comes off

Undo footwell air director - loosen one plastic torx screw and unclip footwell air director from housing

Unclip brake and clutch switches - locate brake switch, twist in metal bracket housing and release. Note the brake lights will now be lit, if you don’t want them lit for the duration of the job, then mask off the connector end to make the connection and extinguish the lights.
Reach up further, locate clutch switch, twist in metal bracket housing and release.

If you now lie with your head by the clutch pedal you should be able to see a clear path to the sensor. Note you will not be able to see the sensor at this stage, all you have done is clear a path for your hand.
If you want to see the sensor, move your head towards the centre console and look up past the V70 motor that is on the inner side of the aluminium bracket by the clutch pedal. It's pretty non-descript but what you will be looking at is the end of the sensor and connected connector, that is on the left hand side of the G263 picture above (connector not pictured).
Sensor removal
I found it easiest to sit on the passenger seat and lie back at an angle with my face on the upper dash on the passenger side of the instrument binnacle. You will be flying blind. Closing your eyes and sticking your tongue out to aid concentration are optional!
Using your right hand, follow the path you have created and feel around for the clutch switch bracket to use as a reference point.
When the clutch switch bracket digs sharply into the back of your hand just above your wrist you should find immediately below your thumb will be a hole and through this you will be able to feel the G263 sensor end. Likewise, through a separate hole, underneath your index finger you will be able to grasp the sensor. Your thumb palm should now be completely around the aluminium cell.
The important bit is to realise that the sensor is held in by suction and therefore if you remove the connector before attempting to remove the sensor it's impossible - well it was for me anyhow. Attempting to release the sensor with the connector still on, means you can grasp the tab wings and carefully ease it out.
Be aware that the connector wires have a relatively limited amount of travel so ensure you're pulling is as straight a line as possible and don't pull further than you absolutely have to, once the sensor is released.
Connector removal from sensor
To remove the connector from the sensor, re-position so you are facing up in the footwell with your head fighting with the clutch pedal. With a bit of pre-planning, there is a clear path for your left arm through behind the pedal box and up to the end of the sensor. You have to get elbow deep and keep pushing until your left hand reaches the sensor. With you right hand following the path it did to remove the sensor in the first place, this means you can get both hands on it and remove the connector easily.
Refitting
Refit is simply a repeat of removal but in reverse, being careful to feel for the locating hole before pushing the sensor home. Again, halfway through refitting you need to re-position from the passenger seat to the drivers footwell to reconnect the connector and then returning to passenger seat you will be able to push the sensor home.
All-in-all it took me 15 minutes and is an easy DIY task requiring a little gymnastic ability
Last edited:
