wilco184
Member of the year 2015
Hello all,
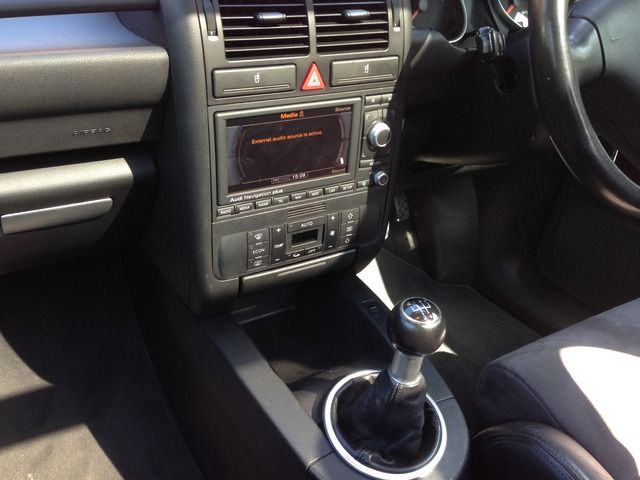
Over the past few weeks, I've been collecting the parts needed for retrofitting both a double DIN dashboard and a MK2 RNSE. Both have been fitted this past weekend, and needless to day, I'm extremely happy with the result.
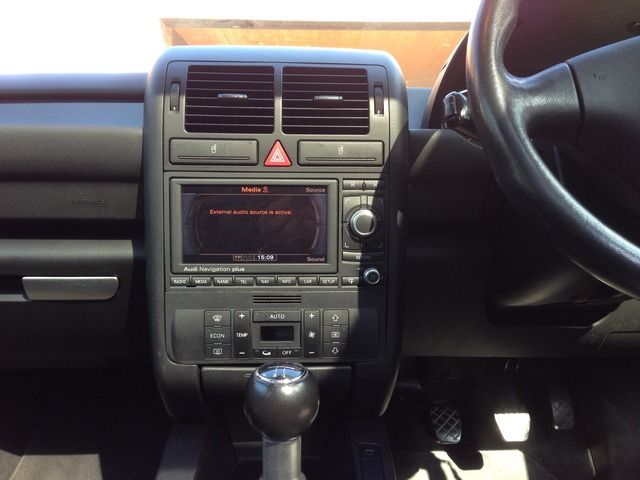
I figured I'd do a small write-up about my experience fitting both, and perhaps answer some questions that I couldn't find the answer to on here, before I began. I may be able to write an FAQ about the RNSE installation for others, should there be interest? I learned a lot before I started, and so I may be able to pass this knowledge on.
As 'craigyb' discovered, to use a MK2 unit with the A2, you will need a very specific model. I am referring to the 'B' revision of the unit, with the matt screen surround. The reasoning for this being that only this revision has the ability to use GALA for the speed signal, the A2 uses GALA, instead of getting the speed signal over the CAN-BUS, as other cars and other revisions of the MK2 unit do. A big thanks to Craig, his expertise has been invaluable to the A2OC.
To complete this installation, I needed the following parts:
- MK2 RNSE (8P0035193B HW02)
- Double DIN Dash
- Mini ISO to Quadlock Adapter
- Aerial ISO to Dual Fakra Adapter
- GPS Antenna
- 32 Pin Connector Block and Repair Wires (More on this later)
I started by connecting the RNSE unit to the car, and getting everything coded and working before anything was removed or cut. I'd certainly recommend this, it would have been a nightmare for me to swap out the dash only to find other problems with the unit not working. The process required for getting the unit working correctly with the A2 is as follows.
- Connect up RNSE.
- Use VCDS to change channel 97 in the navigation controller from 0 to 1.
- Insert the software 0150 disc.
- Let the software downgrade run.
- Use VCDS to code the RNSE unit for use in an A6(4B).
- Use VCDS to change channel 97 in the navigation controller from 1 to 0.
- Insert the software 0220 disc.
- Let the software upgrade run.
- Use VCDS to change channel 62 in the instrument controller and add 4 to the current value. (Ignore this step if converting from previous navigation)
- Check functionality.
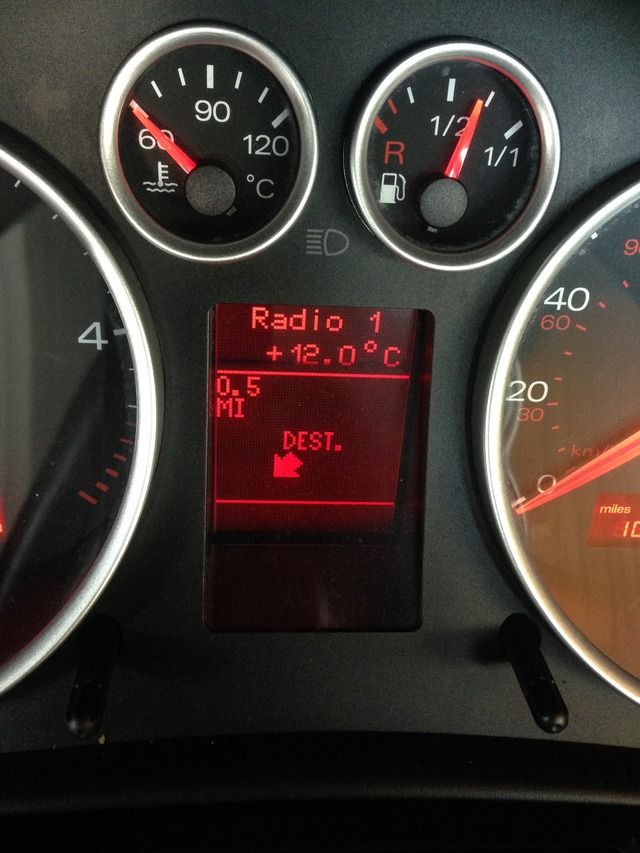
I also checked that the navigation instructions were displayed in the instruments at this point. See picture below.
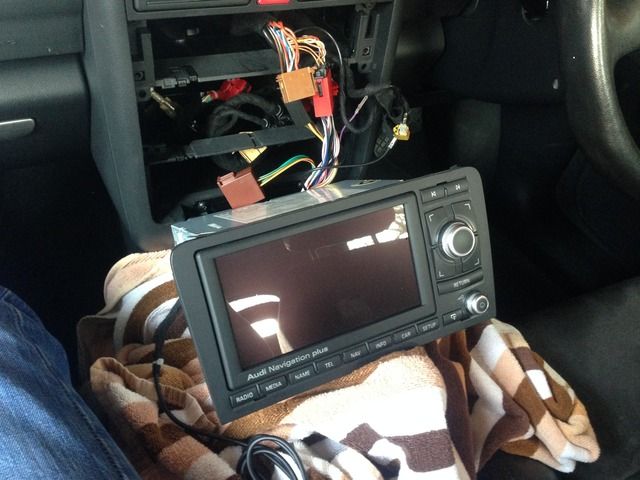
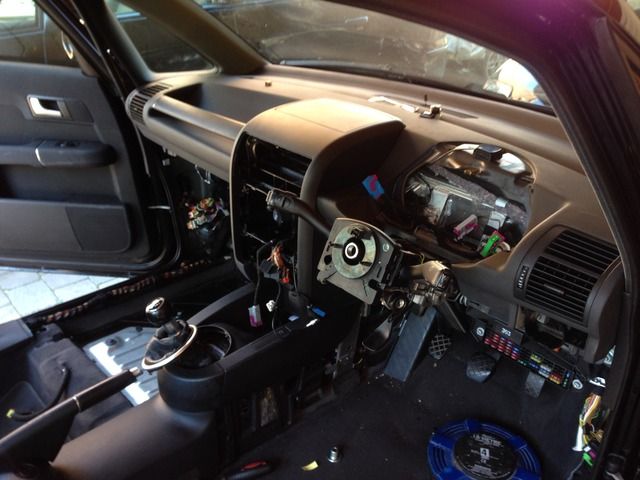
Next, I needed to swap my existing single DIN dash for the double DIN dash. I started by removing all of the obvious things, like the radio, climate control, glovebox, etc. I won't discuss removing the airbags as I don't want to be accountable if someone is to follow my advice and get hurt, but once they are out of the way, the steering wheel centre bolt is M12 XZN. I also removed the front seats to make access much easier. From memory of ElsaWin, I don't think you need to do this to remove the dashboard, but it certainly improved accessibility. The seat bolts are M8 XZN.
Without everything else out of the way and removed, I proceeded to remove the dashboard from the car. I expected it to be a minefield of hidden bolts, fragile clips and out of reach fixings, but it reality, you only need to remove a small handful of bolts, all of which are the same and can go back in any location; excluding the two Torx head bolts near where the drivers and passengers knees go. ElsaWin really is essential for this, and I wouldn't recommend starting it without this software.
With the single DIN dashboard removed, the double DIN was put back in its place. All of the bolts went back in without too much trouble, and it sat perfectly in position. Reassembly can then begin, bar the instrument cluster. All of it is pretty much the reverse of removal, and not too difficult. I didn't take many pictures at all during the installation, but I did capture the following two.
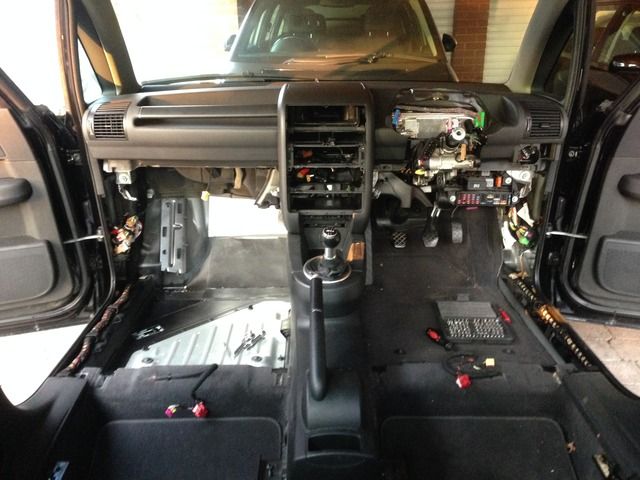
You will need to run a new wire for the GALA speed signal from the radio plugs to the instrument cluster plugs. Specifically, you will need to run a new wire from pin 1 of the black 8 pin connector at the radio end, and splice it into the wire coming from pin 31 of the blue connector at the instruments end.
You need to position the GPS antenna too. I chose to put mine behind the instrument cluster, as per Ben's guide. It was stuck down with a foamed double sided adhesive tape and then the wire passed through to the radio area.
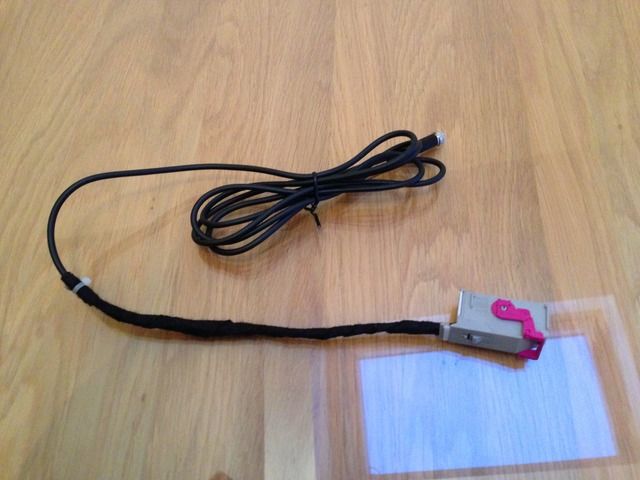
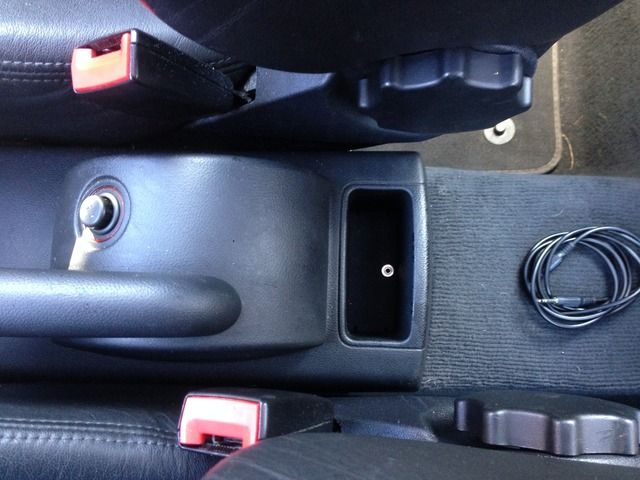
For my retrofit, I had also decided to install an AUX input. There's a 32 pin socket on the back of the RNSE unit which can be used to install an AUX input. You'll need the connector and 3 crimped wire ends to this. The repair wires from Audi have a crimp at each end so you'll need to buy 2. The part number for the connector is 1J0972977G and the part number for the repair wires is 000979009E. Next, you'll need a 3.5 mm socket or plug, depending on preference. I chose a panel mounted socket, such that I could install it as seen below, in the second picture. The first picture shows my finished AUX socket loom, wrapped in Tesa tape.
With all of the wiring done, and the RNSE correctly coded and working, I started the cutting and reshaping process by starting with the climate control unit. The mounting points are exactly the same on the single DIN and double DIN dashboards, but the bottom corners must be 'rounded off' to enable my single DIN unit to fit into the new double DIN dash. This was done by making a template and then using a file to shape it accordingly.
Next, the RNSE unit must be cut to suit the A2's dashboard. The A3 RNSE fascia is much larger than that of the A2, and I can confirm there is more than enough plastic left around the outside. In fact, all 4 sides of the RNSE had to be trimmed in order for it to fit. Ben provided an excellent 'how to' for this, and it can be found in his guide for the Symphony to RNS-E retrofit. The link for this is here. http://www.a2oc.net/forum/showthread.php?4556-Retrofitting-RNS-E-from-Audi-Symphony-II I'd like to thank Ben for this post, it was extremely useful.
After this, everything is pretty much done! I had to do a little work trying to fix a rattle, but this was soon rectified.
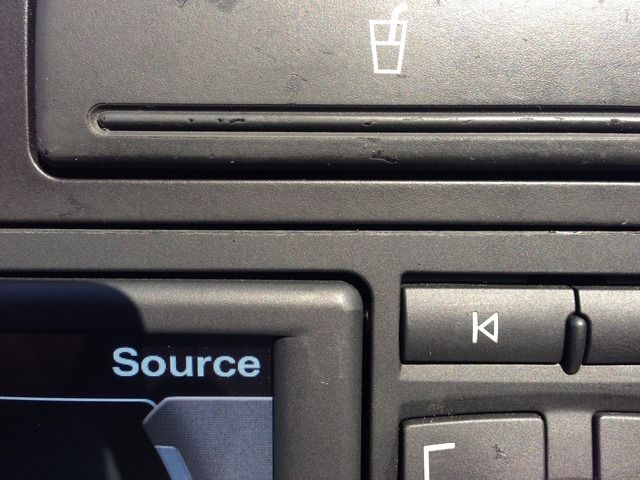
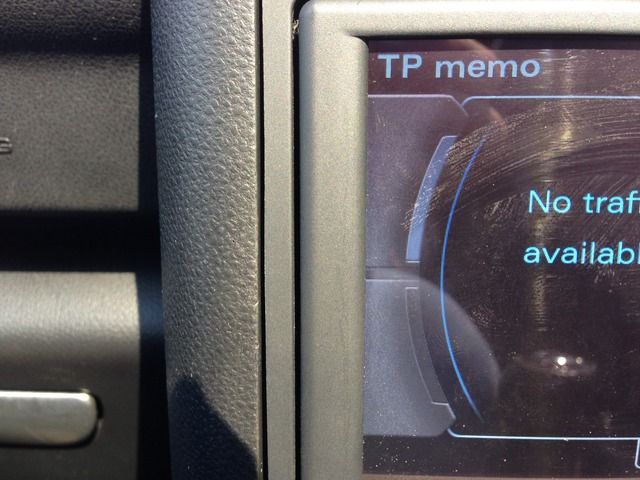
I've used the RNS-E unit for a couple of journeys now, and I must say, it is very good. The way you can navigate through folders on the SD card to access songs is fantastic, and the song names are shown on the DIS. I think one of the biggest compliments I can pay to the RNSE is that it looks like it belongs in the A2's interior; something I feel is very difficult to get right when fitting parts from other cars, even Audi's, but it just looks 'right' to my eyes. The surface of the RNSE is very similar, if not identical to that of the A2's interior. The black looks the same and the texture is spot on. There's a close up picture of this below.
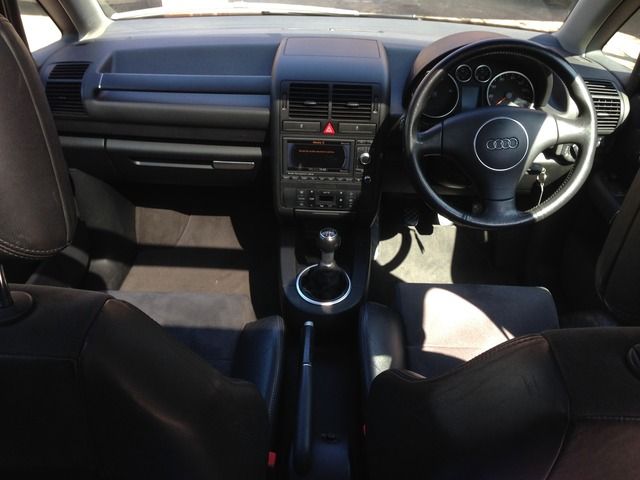
Anyway, the A2OC seems to like pictures, so I'll leave a few below of the result.
Regards,
Matt.
Over the past few weeks, I've been collecting the parts needed for retrofitting both a double DIN dashboard and a MK2 RNSE. Both have been fitted this past weekend, and needless to day, I'm extremely happy with the result.

I figured I'd do a small write-up about my experience fitting both, and perhaps answer some questions that I couldn't find the answer to on here, before I began. I may be able to write an FAQ about the RNSE installation for others, should there be interest? I learned a lot before I started, and so I may be able to pass this knowledge on.
As 'craigyb' discovered, to use a MK2 unit with the A2, you will need a very specific model. I am referring to the 'B' revision of the unit, with the matt screen surround. The reasoning for this being that only this revision has the ability to use GALA for the speed signal, the A2 uses GALA, instead of getting the speed signal over the CAN-BUS, as other cars and other revisions of the MK2 unit do. A big thanks to Craig, his expertise has been invaluable to the A2OC.
To complete this installation, I needed the following parts:
- MK2 RNSE (8P0035193B HW02)
- Double DIN Dash
- Mini ISO to Quadlock Adapter
- Aerial ISO to Dual Fakra Adapter
- GPS Antenna
- 32 Pin Connector Block and Repair Wires (More on this later)
I started by connecting the RNSE unit to the car, and getting everything coded and working before anything was removed or cut. I'd certainly recommend this, it would have been a nightmare for me to swap out the dash only to find other problems with the unit not working. The process required for getting the unit working correctly with the A2 is as follows.
- Connect up RNSE.
- Use VCDS to change channel 97 in the navigation controller from 0 to 1.
- Insert the software 0150 disc.
- Let the software downgrade run.
- Use VCDS to code the RNSE unit for use in an A6(4B).
- Use VCDS to change channel 97 in the navigation controller from 1 to 0.
- Insert the software 0220 disc.
- Let the software upgrade run.
- Use VCDS to change channel 62 in the instrument controller and add 4 to the current value. (Ignore this step if converting from previous navigation)
- Check functionality.
I also checked that the navigation instructions were displayed in the instruments at this point. See picture below.


Next, I needed to swap my existing single DIN dash for the double DIN dash. I started by removing all of the obvious things, like the radio, climate control, glovebox, etc. I won't discuss removing the airbags as I don't want to be accountable if someone is to follow my advice and get hurt, but once they are out of the way, the steering wheel centre bolt is M12 XZN. I also removed the front seats to make access much easier. From memory of ElsaWin, I don't think you need to do this to remove the dashboard, but it certainly improved accessibility. The seat bolts are M8 XZN.
Without everything else out of the way and removed, I proceeded to remove the dashboard from the car. I expected it to be a minefield of hidden bolts, fragile clips and out of reach fixings, but it reality, you only need to remove a small handful of bolts, all of which are the same and can go back in any location; excluding the two Torx head bolts near where the drivers and passengers knees go. ElsaWin really is essential for this, and I wouldn't recommend starting it without this software.
With the single DIN dashboard removed, the double DIN was put back in its place. All of the bolts went back in without too much trouble, and it sat perfectly in position. Reassembly can then begin, bar the instrument cluster. All of it is pretty much the reverse of removal, and not too difficult. I didn't take many pictures at all during the installation, but I did capture the following two.


You will need to run a new wire for the GALA speed signal from the radio plugs to the instrument cluster plugs. Specifically, you will need to run a new wire from pin 1 of the black 8 pin connector at the radio end, and splice it into the wire coming from pin 31 of the blue connector at the instruments end.
You need to position the GPS antenna too. I chose to put mine behind the instrument cluster, as per Ben's guide. It was stuck down with a foamed double sided adhesive tape and then the wire passed through to the radio area.
For my retrofit, I had also decided to install an AUX input. There's a 32 pin socket on the back of the RNSE unit which can be used to install an AUX input. You'll need the connector and 3 crimped wire ends to this. The repair wires from Audi have a crimp at each end so you'll need to buy 2. The part number for the connector is 1J0972977G and the part number for the repair wires is 000979009E. Next, you'll need a 3.5 mm socket or plug, depending on preference. I chose a panel mounted socket, such that I could install it as seen below, in the second picture. The first picture shows my finished AUX socket loom, wrapped in Tesa tape.


With all of the wiring done, and the RNSE correctly coded and working, I started the cutting and reshaping process by starting with the climate control unit. The mounting points are exactly the same on the single DIN and double DIN dashboards, but the bottom corners must be 'rounded off' to enable my single DIN unit to fit into the new double DIN dash. This was done by making a template and then using a file to shape it accordingly.
Next, the RNSE unit must be cut to suit the A2's dashboard. The A3 RNSE fascia is much larger than that of the A2, and I can confirm there is more than enough plastic left around the outside. In fact, all 4 sides of the RNSE had to be trimmed in order for it to fit. Ben provided an excellent 'how to' for this, and it can be found in his guide for the Symphony to RNS-E retrofit. The link for this is here. http://www.a2oc.net/forum/showthread.php?4556-Retrofitting-RNS-E-from-Audi-Symphony-II I'd like to thank Ben for this post, it was extremely useful.
After this, everything is pretty much done!
I've used the RNS-E unit for a couple of journeys now, and I must say, it is very good. The way you can navigate through folders on the SD card to access songs is fantastic, and the song names are shown on the DIS. I think one of the biggest compliments I can pay to the RNSE is that it looks like it belongs in the A2's interior; something I feel is very difficult to get right when fitting parts from other cars, even Audi's, but it just looks 'right' to my eyes. The surface of the RNSE is very similar, if not identical to that of the A2's interior. The black looks the same and the texture is spot on. There's a close up picture of this below.
Anyway, the A2OC seems to like pictures, so I'll leave a few below of the result.
Regards,
Matt.

